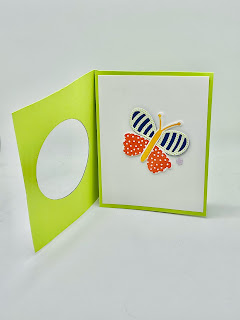
Hello, and welcome to my blog post on today's easy Fun Fold card, using the new BUTTERFLY KISSES stamp set bundle from the new annual catalog.
It's been a while since I've done a blog post, and I am hoping to get back into blogging again about all my cards, and projects. This past month has been a real challenge with all of us being sick and trying to get back into the swing of things. I never thought I would get this suite of products BUTTERFLY KISSES because I'm not a butterfly person. When I looked at the new catalog the first couple of times, I knew I wanted the (DSP) Designer Series Paper, and the RESIN FLOWERS. I decided to go ahead and get the stamp set bundle as it looked like it would be an easy stamp set to work with. The more I work with this set, the more I enjoy playing with it. I will include all my measurements, supplies. and you tube video.
I started with a piece of PARAKEET PARTY CARDSTOCK and did my first score mark at 5 1/2" on the long side, the 11" side. I turned it to the 8 1/2" side and scored it at 4 1/4" and I cut away the upper left corner of the cardstock using the trimmer. I tried using the snips to cut this panel away but it didn't work out to well. From the you tube video I demonstrate how to cut this away using the trimmer. After I cut this away I then used my bone folder and folded the card on the score lines. Before adding the inside basic white cardstock cut at 5 1/4" X 4" I needed to cut out my circle for the front of my card. I used the new STYISH SHAPES biggest circle die to cut this out with. After I cut this out I laid my two layers of the (DSP) Designer Series Paper cut at 3 3/4" X 5" and the STARRY SKY cardstock cut at 4" X 5 1/4" on the front of this card using some paper clips to hold it down temporary. I needed to cut out another circle using this die on the layers and traced with a pencil on the backside of the card front.
Using the new MAGANETIC CUTTING PLATE for the CUT AND EMBOSSING MACHINE, I don't have to use any more post it tape to hold down my matching dies anymore. Once I cut this out from my two layers I glue it down to the card front with liquid glue. I stamped all my images and cut out any other remaining pieces I needed to build my butterfly for the card front. For the other panel inside this card I used another piece of BASIC WHITE cardstock and stamped my sentiment. For the small butterfly I added some ADHESIVE SHEET to a piece of CALYPSO COARAL cardstock before cutting it out with the die. For these types of intricate dies I like to use the ADHESIVE SHEETS to make it easier to adhere them to the paper. For the card front sentiment I fussy cut the stamped sentiment and added it to a small piece of the DSP cut at 3/4" X 3 1/2" I took my snips and flagged the ends of it. Thank so much for coming by today and checking out my blog post, just below is the you tube video, and the supplies I used.
YOU TUBE VIDEO:
SUPPLIES USED :
Product List


No comments:
Post a Comment